The Digital Culinary Revolution: What is Emoji Kitchen?
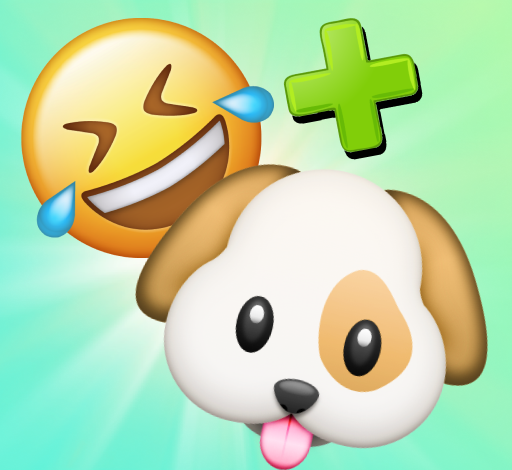
In the vast, ever-evolving landscape of digital communication, the Emoji Kitchen has emerged as one of the most delightful and creative disruptions to the way we express ourselves. Originally launched by Google as a feature within Gboard (the Google Keyboard), this tool allows users to take two separate emojis and “cook” them together to create a completely new, often hilarious, or deeply expressive sticker. By the time we’ve reached 2026, it has transitioned from a niche Android feature to a cross-platform cultural mainstay, available via Google Search and third-party browsers. It represents a shift from a static, fixed library of symbols to a dynamic, generative language that adapts to the specific nuances of human emotion.
Expertly speaking, the Emoji Kitchen isn’t just a simple overlay of two PNG files. It is a massive library of thousands of hand-crafted illustrations designed by a team of artists who have anticipated the “logic” of these combinations. If you combine a “Cactus” with a “Cat,” you don’t just get two icons side-by-side; you get a prickly, green feline that perfectly encapsulates the feeling of being “moody yet cute.” This level of curation is what separates the Emoji Kitchen from AI-generated chaos. Every combination feels intentional, polished, and tailored to fit the specific visual language of the Unicode standard while pushing the boundaries of what a single glyph can communicate.
Casually, it’s like being a digital alchemist. We’ve all been in that situation where a standard “Laughing Crying” face doesn’t quite hit the mark, or where a “Heart” feels too generic. The Emoji Kitchen solves the problem of “visual vocabulary fatigue.” It allows for a level of hyper-specificity that was previously impossible. Whether you’re sending a “Cowboy Ghost” to signify a spirited night out or a “Melting Heart” to show extreme adoration, the Emoji Kitchen gives you the tools to be a more precise communicator. It’s the ultimate “vibe check” for the modern age, turning every text thread into a potential gallery of custom art.
The Mechanics of the Mashup: How the Magic Happens

From a technical and design perspective, the Emoji Kitchen is a masterclass in “Modular Design.” The developers at Google didn’t just automate this process; they built a framework where specific traits of an emoji—color, texture, expression, and iconic accessories—can be extracted and blended with another. For example, if you pair a “Robot” with any “Face” emoji, the resulting sticker will almost always adopt the metallic sheen and glowing eyes of the robot while maintaining the mouth and eyebrow position of the face. This consistency across thousands of combinations is what makes the tool feel like a professional design suite hidden inside a keyboard.
In 2026, the complexity of these mashups has reached a new peak. The “Expert” level of Emoji Kitchen use involves understanding “Base” emojis and “Modifier” emojis. Some emojis, like the “Cloud” or the “Sparkles,” act as environmental modifiers, adding a specific atmosphere to whatever they are paired with. Others, like the “Skull” or “Poop” emojis, act as stylistic filters, completely transforming the mood of the primary icon. The system is designed to handle recursive logic—meaning it knows exactly how to make a “Partying Face” look like it’s made of “Bread” without losing the essence of the celebration. It is a triumph of vector illustration and data mapping.
Furthermore, the Emoji Kitchen has successfully navigated the “Cross-Platform Bridge.” While it started as an Android exclusive, its integration into the Google Search bar means that iOS users and desktop enthusiasts can now join the fun. You can “cook” your combination in a browser, copy the resulting sticker, and paste it into iMessage, WhatsApp, or Discord. This move toward platform-agnosticism has cemented the Emoji Kitchen’s status as a fundamental tool for the 21st-century internet. It acknowledges that our digital identity shouldn’t be limited by our operating system; if we want to send a “Fire-Breathing Snail,” we should be able to do it regardless of the hardware in our pocket.
Psychological Impact: Why We Love Combining Emojis
Beyond the cool tech and the cute stickers, the Emoji Kitchen taps into a deep-seated human desire for “Creative Agency.” In a digital world that often feels standardized and algorithmic, the ability to create something unique—even if it’s just a funny sticker—provides a sense of ownership over our digital interactions. When you send a custom emoji mashup, you are telling the recipient, “I put a moment of thought into this specifically for you.” It adds a layer of “Digital Sincerity” to our conversations, moving away from the “low-effort” feel of a single, standard reaction.
Experts in linguistics and digital sociology note that the Emoji Kitchen acts as a “Nuance Engine.” Standard emojis can sometimes be misinterpreted because of their broad meanings. However, a “Crying Heart” or a “Thinking Alien” provides a much clearer emotional signal. It allows for “Visual Pun-Making,” a form of humor that is particularly resonant with Gen Z and Alpha. The ability to create a “Visual Punchline” by mashing up a “Croc” and a “Police Car” creates a shared language within friend groups, where specific combinations become inside jokes. It’s a way of building social capital through creative expression.
Moreover, the Emoji Kitchen serves as a “Stress-Relief Tool.” There is something inherently satisfying about the “Randomize” button—seeing what kind of bizarre, surrealist creations the engine can spit out. It’s a form of “Micro-Play” that fits into the gaps of our busy lives. Whether you’re waiting for the bus or sitting in a boring meeting, a quick session in the Emoji Kitchen can provide a momentary spark of joy. It’s the digital equivalent of doodling in the margins of a notebook, a low-stakes creative outlet that rewards curiosity and rewards the user with a tangible, shareable result.
The Future of Visual Language: Where Does Emoji Kitchen Go Next?
As we look toward the late 2020s, the Emoji Kitchen is likely the precursor to a much larger shift toward “Generative Personalization.” We are already seeing hints of AI-integrated Emoji Kitchens where users can provide a text prompt like “a depressed taco wearing sunglasses” and receive a high-fidelity sticker that follows the Emoji Kitchen aesthetic. This “AI-Assisted Creativity” will allow the library to expand from thousands of combinations to millions, effectively ensuring that no two digital conversations ever have to look the same. The boundary between “Standard Emoji” and “Personal Illustration” is disappearing.
From an expert’s point of view, the next step is “Animated Mashups.” Imagine a “Bouncing Pizza” or a “Crying Raincloud” that uses the same modular logic to create custom GIFs on the fly. As 5G and 6G networks become the standard, the data overhead for sending these animated, custom stickers will become negligible. We are also likely to see “Brand-Integrated Kitchens,” where users can mash up their favorite characters from movies or games with standard emojis—imagine a “Mickey Mouse” heart or a “Star Wars” themed thumbs-up. The Emoji Kitchen is becoming a platform for intellectual property to live and breathe within our private chats.
Finally, the Emoji Kitchen is a testament to the “Resilience of the Symbol.” Despite the rise of video messages and voice notes, the static (or semi-static) icon remains the most efficient way to convey an idea. The Emoji Kitchen has extended the life of the emoji by decades, proving that the system is flexible enough to stay relevant in an AI-driven world. It reminds us that at the heart of all our technology is a simple, human desire: to be understood, to be unique, and to have a little bit of fun along the way. Whether you’re a power user or a casual tapper, the Emoji Kitchen is your laboratory for the future of language. Let’s go.